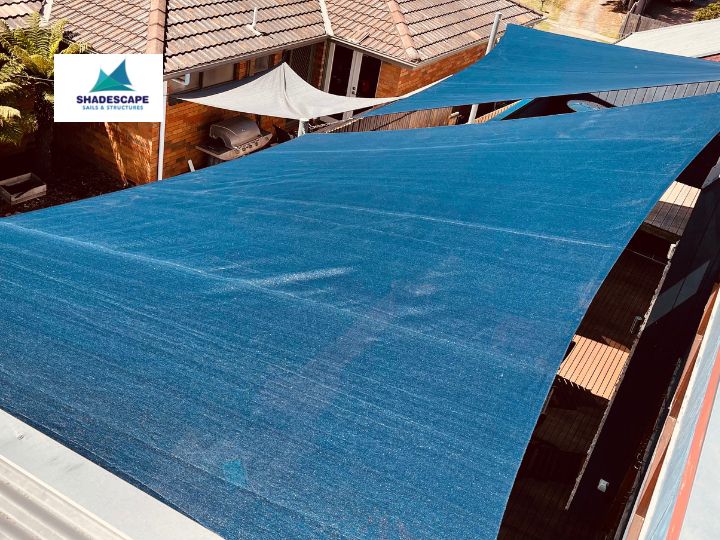
Getting the measurements right for a custom shade sail is the single most important part of the entire installation. If you are off by even a few centimeters, you will end up with a sail that sags in the middle, pools water after a heavy downpour, or flaps loudly during strong winds.
In unpredictable climates with intense sun and sudden storm gusts, a loose shade sail doesn’t just look bad—it acts like a parachute, putting dangerous amounts of stress on your anchor points, steel posts, and house fascia.
The biggest mistake property owners make is simply measuring the distance between their posts, ordering a sail of that exact size, and realizing too late that they have no room left to attach the tensioning hardware.
Whether you are putting up a three-sided triangle over a backyard pool or a massive four-sided hyperbolic sail for a commercial space, this guide covers the exact step-by-step measuring formula the professionals use.
The Golden Rule: Point-to-Point vs. Sail Size
Before you pick up a tape measure, you need to understand the fundamental difference between Point-to-Point Measurements and the Final Sail Size.
When you order a custom shade sail, manufacturers don’t want you to guess the size of the fabric. They need the exact distance between your anchor points (the heavy-duty eyebolts or wall plates).
What is the Hardware Allowance (Tension Gap)?
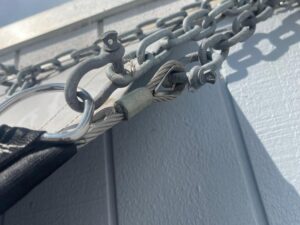
A shade sail cannot stretch directly from post to post. You need clear space at every corner for turnbuckles, D-shackles, and tensioning chains. This space is called the hardware allowance.
- Standard Hardware Gap: Typically, you need between 250mm and 400mm of space at every single corner to allow the turnbuckles to tighten properly.
- Fabric Stretch: High-quality architectural shade mesh (Z16 or Extrablock) will stretch about 1% to 2% under tension.
If you are buying a pre-made, off-the-shelf sail, you must calculate and deduct this hardware allowance yourself. If you are ordering a custom-made sail, you simply provide the exact Point-to-Point measurements, and your sailmaker will calculate the structural deductions for you.
What You Need Before You Start
Do not try to measure a large outdoor space with a standard 5-meter builder’s tape measure. If the tape bends or sags in the air, your measurements will be completely inaccurate.
Gather these essential tools:
- A long fiberglass tape measure (20m to 30m).
- A sturdy ladder.
- A notepad and pen to draw a clear diagram.
- A second person to hold the other end of the tape dead straight.
Step 1: Install Your Anchor Points First
Never measure for a shade sail based on where you think the posts will go. You must physically install your steel posts, wall brackets, and fascia supports before taking a single measurement.
Why? Because concrete footings can shift slightly as they cure, and wall brackets might need to be shifted a few inches to hit a solid structural stud. Once the eyebolts are firmly bolted to the wall and the heavy-duty posts are fully set in concrete, you are ready to measure.
Step 2: Measure the Perimeter (The Outside Edges)
Draw a rough sketch of your area on a piece of paper. Label your anchor points clockwise as A, B, C, and D (for a four-sided sail) or A, B, and C (for a triangle).
Measure the exact distance from the inside bearing point of one eyebolt to the inside bearing point of the next. Keep the tape measure pulled tight and perfectly straight.
Write down the perimeter distances:
- Point A to Point B: ________ mm
- Point B to Point C: ________ mm
- Point C to Point D: ________ mm
- Point D to Point A: ________ mm
Step 3: Measure the Diagonals (The Secret to 4-Sided Sails)
This is the step most DIYers skip, and it is the exact reason their square shade sails arrive looking like skewed parallelograms.
If you have a four-sided sail, knowing the four outside edges is not enough geometry to lock in the true shape. You must measure across the middle of the space to form an “X”.
Measure the diagonals:
- Point A straight across to Point C: ________ mm
- Point B straight across to Point D: ________ mm
By providing the diagonals, your custom sailmaker can plot the exact angles of your specific structure, ensuring the fabric fits perfectly when tensioned.
Step 4: Map the Heights for the “Hypar” Twist
A flat shade sail is a failed shade sail. If all four corners are at the exact same height, rain will pool in the dead center, stretching the fabric and eventually ripping the anchor points out of the wall.
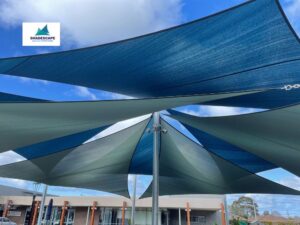
To create structural rigidity and allow water to run off safely, shade sails require a Hyperbolic Paraboloid (Hypar) effect. This is achieved by alternating high and low anchor points (e.g., Points A and C are high; Points B and D are low).
How to measure the heights: Choose a level datum point (like your patio floor or a perfectly level string line) and measure straight up to each eyebolt.
- Height at Point A: ________ mm
- Height at Point B: ________ mm
- Height at Point C: ________ mm
- Height at Point D: ________ mm
These 3D height measurements allow the manufacturer to cut the curved edges (the hollows) along the sides of the sail so it stays tight when twisted into place.
Step 5: Double-Check for Obstacles
Before finalizing your diagram, look up. Will the tensioned fabric hit a tree branch when the wind blows? Will it rub against a roof gutter or a downpipe? Shade cloth is highly abrasive. If it rubs against a painted surface or a tree limb, it will wear through within a few months.
If there is an obstacle, you may need to lower an anchor point or alter the canopy’s shape entirely.
Keep Your Sail Tight and Maintained
Once you have measured, ordered, and installed your custom sail, keeping that tension tight is critical for its lifespan. Over time, heavy storms will cause the fabric to stretch slightly and the hardware to settle.
You should perform a quick inspection of your turnbuckles at least once a year. If the sail starts to look loose, turn the hardware a few times to pull it taut again. For a complete guide on keeping your fabric looking brand new, check out our comprehensive shade sail maintenance guide, which covers seasonal cleaning and hardware checks.
Avoid the Hassle: Call the Installation Experts
Measuring, calculating hardware deductions, and plotting 3D diagonal angles can quickly become complicated. If your measurements are wrong by just a few centimeters, you are stuck with a custom-made sail that simply won’t fit.
If you want absolute peace of mind, let the experts handle the geometry. Working with professionals who design and install custom shade sails guarantees a flawless, storm-ready fit.
Our team manages the entire process, from digging the structural footings and installing the anchor points to precision laser-measuring the site and tensioning the final canopy.
Ready to get it done right the first time? Contact the ShadeScape team today to book your on-site measure, quote, and structural assessment!